A long time ago in a galaxy far far away (last bank holiday in Middlesbrough), there was an epic confrontation between the rebel alliance and the powerful imperial army.
I was setting up a little skirmish force when Ben came over and told me I’d need another 200 points. We’d played X-wing miniatures plenty of times, but never an epic battle. This wasn’t going to be the usual dogfighting and tactical manipulation that was usually involved in the game. I’d need to rethink and this was what I came up with…
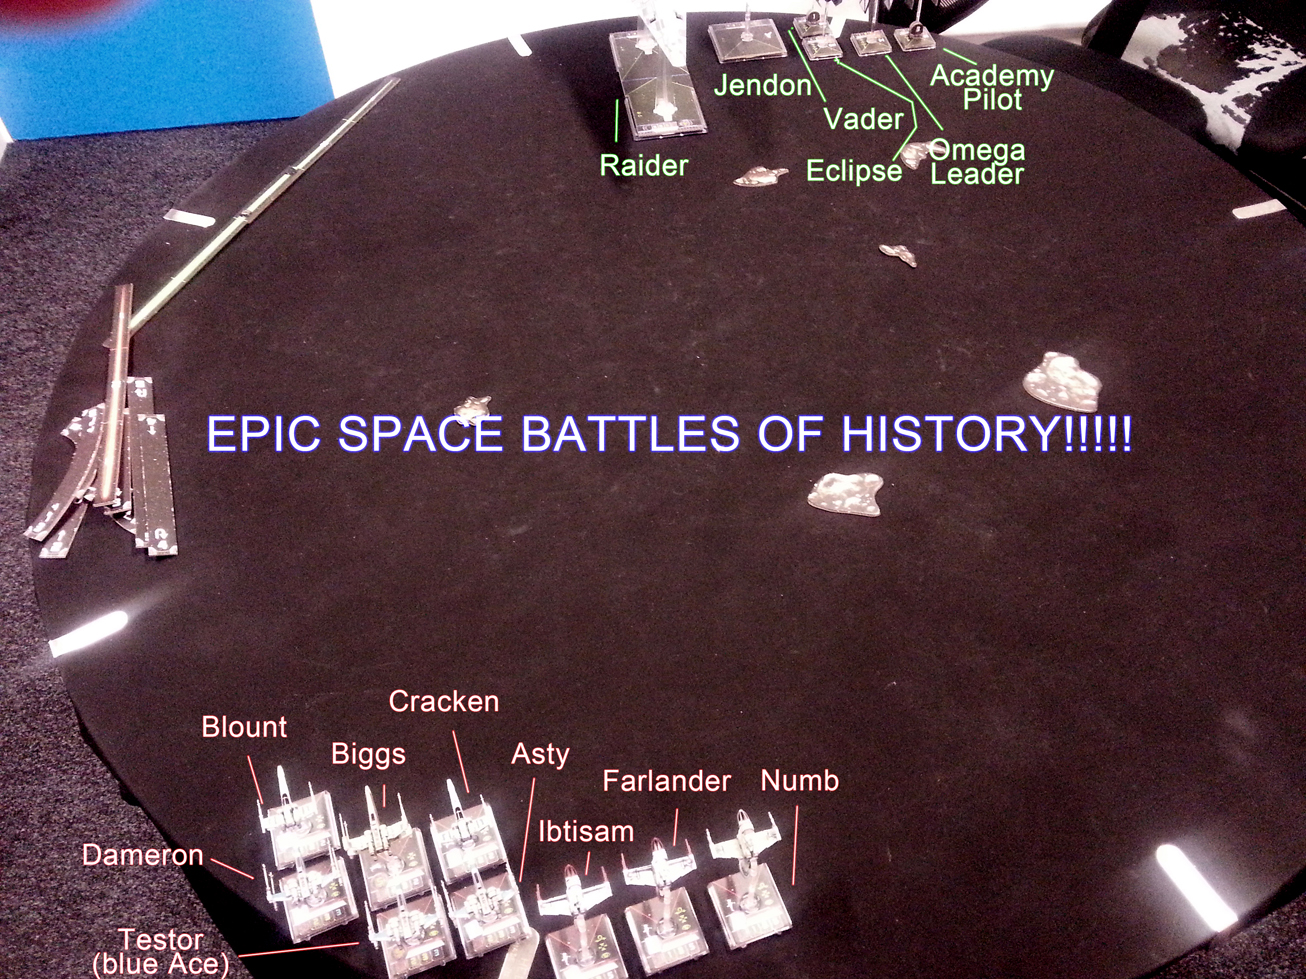
Admittedly I got lazy and resorted to some of the basics of Lanchester’s Law. Sure. I had a few tricks up my sleeve but essentially I decided to bring a lot of guns and shield’s to the battle. The Z-95s are an exception but they serve a particular purpose. I could have, and probably should have taken another good ship but I opted for taking 30 points worth of proton torpedoes because ummm, it kind f felt right. Turns out the Imperial force was centred around the Raider which we’d never battled with before, and that was backed up by a heavy support shuttle, and the ever dangerous combination of Vader + Eclipse. If you care you can take a look at the full squad details then they can be found on our site (Rebels here, and Empire here) if that’s something that interests you. In terms of pure fire power both sides had 9 guns with the empire having a slightly higher potential damage output, but in terms of raw hit point totals the rebels had the advantage with 59 total hit points Vs the empires 54 total hit points. The raider can regenerate shields but when it was doing that then it wouldn’t be shooting as much. The empire also had a slight overall agility advantage here but only on the fighters. times for battle.
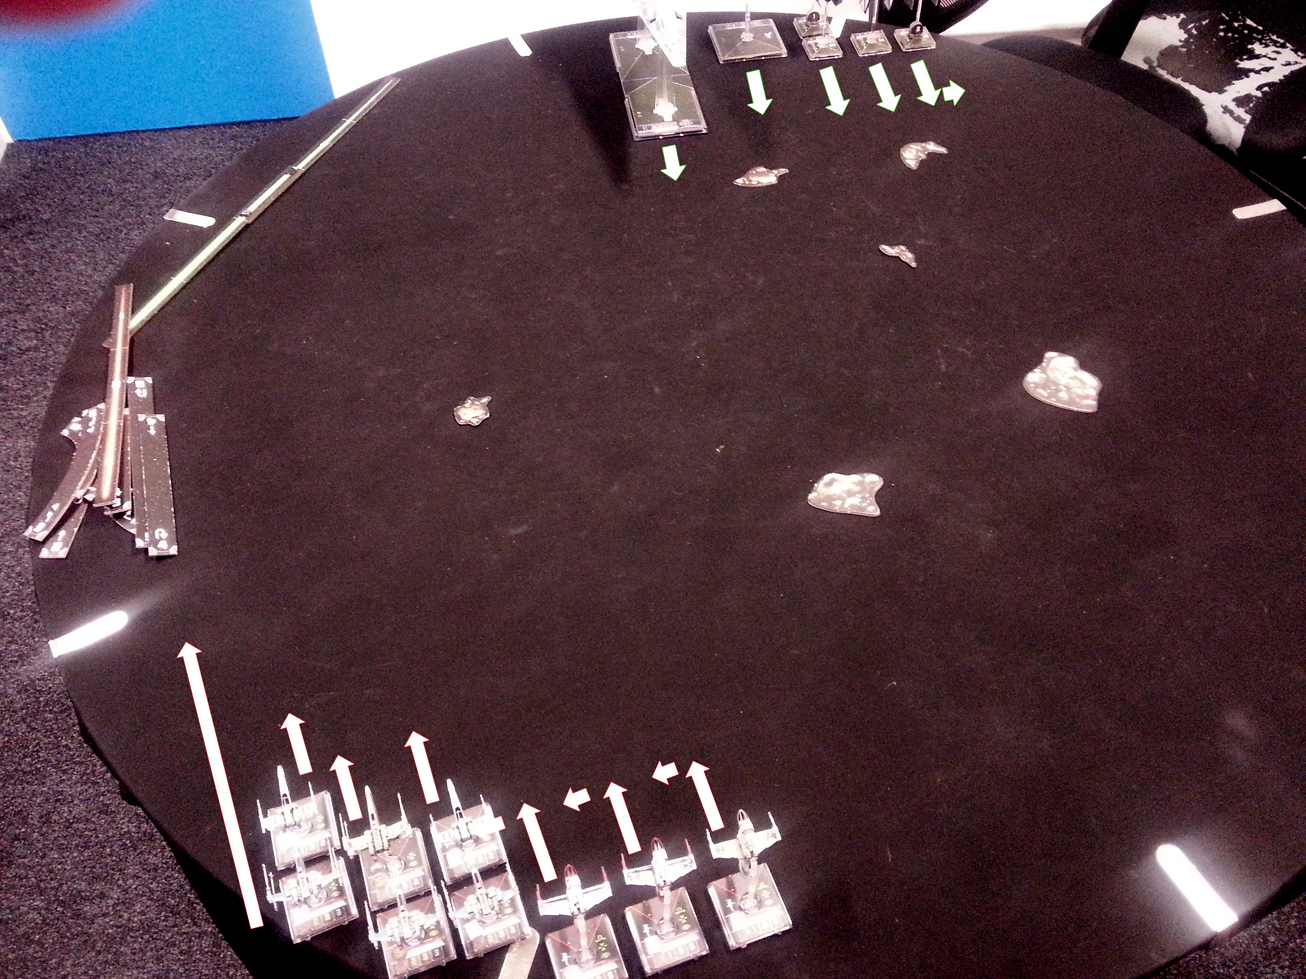
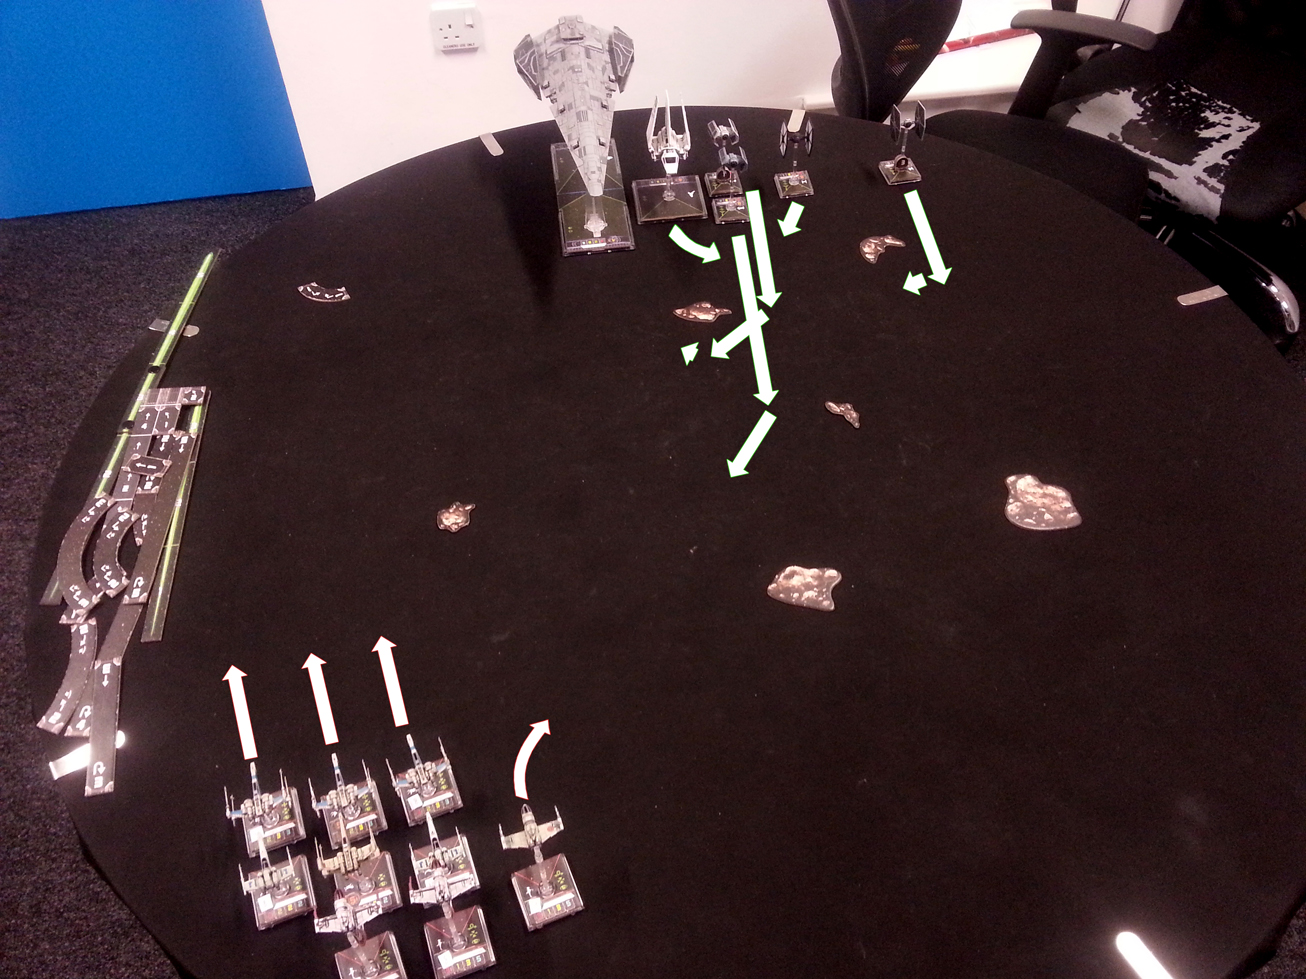
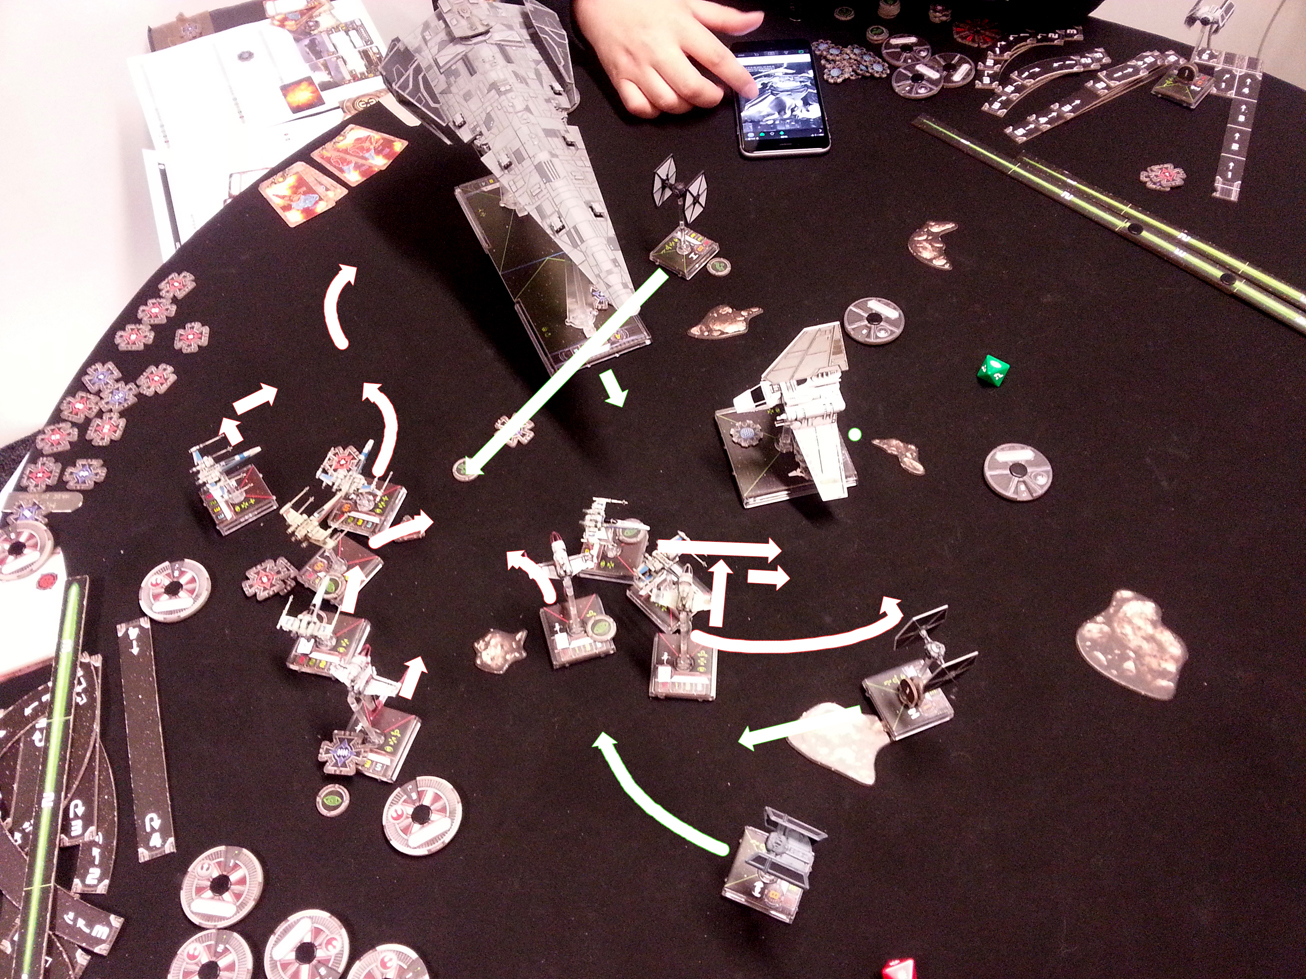
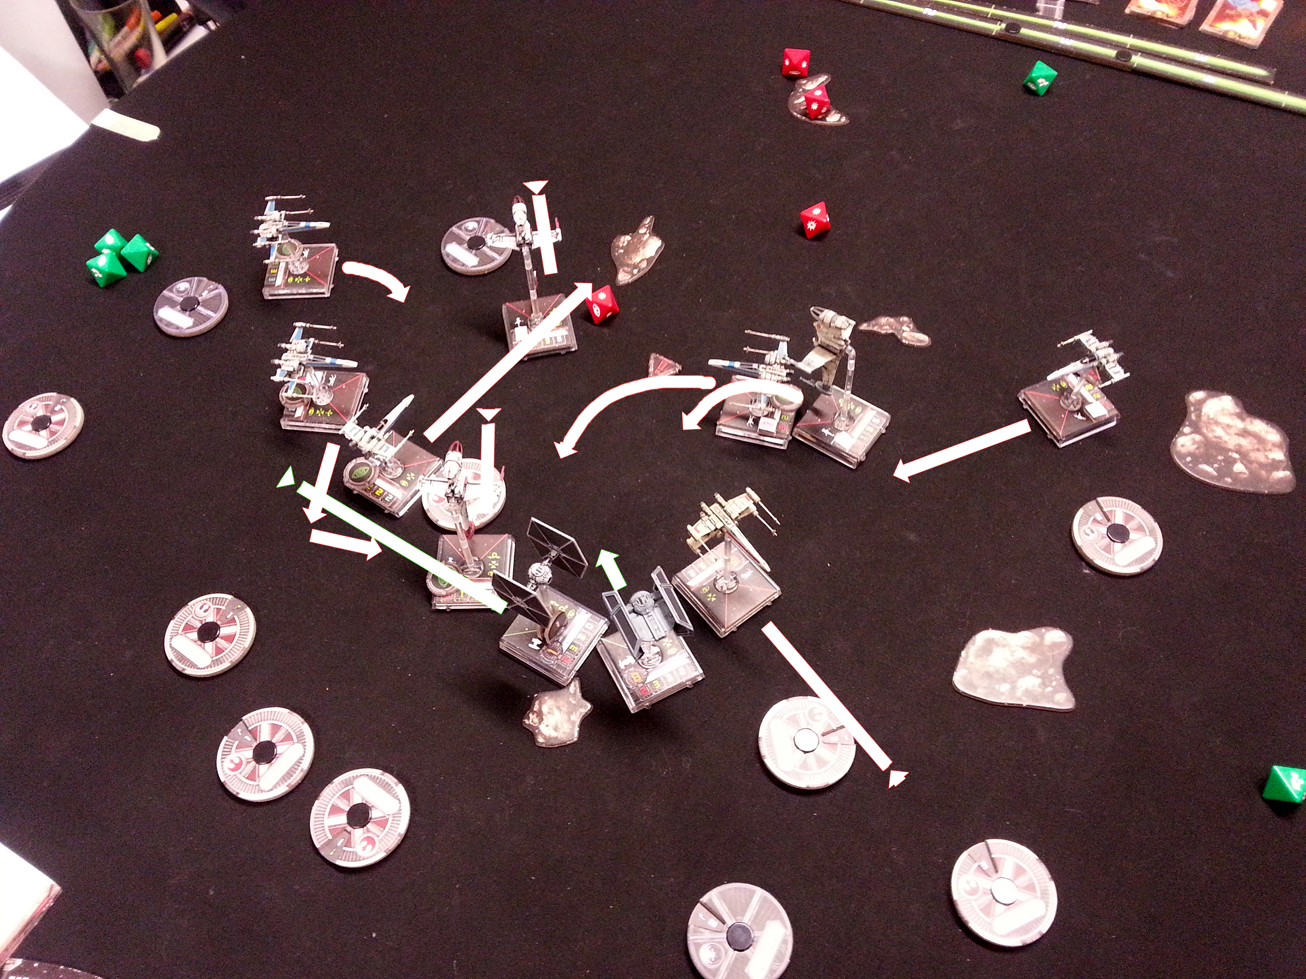
The rebel strategy is immediately apparent and that is ‘everyone hates Biggs!’ Biggs has a purpose in life, and that is to die first. Take those lasers to the face like a champ. He has no equipment except for the integrated astromech which lets him take another laser to the face. The empire looks like it is proceeding carefully so that it can see what the rebels are doing before committing.
The next turn shows the empire rushing forward looking to start a major flanking manoeuvre, the rebel force flinches slightly and has Ten Numb peel off to take unblockable mangler cannon shots at the enemy coming in. Shooting and the next turn are fairly standard. Ten numb gets a good hit in on eclipse at range 3, stripping her shields. Ello Asty at the front of the squad gets hit by an ion cannon, The raiders other shots are all at Biggs (because everyone hates Biggs) but the rolls are average to poor and Biggs dodges them thanks to a focus and range bonus. We rejoin the game at the real point of impact.
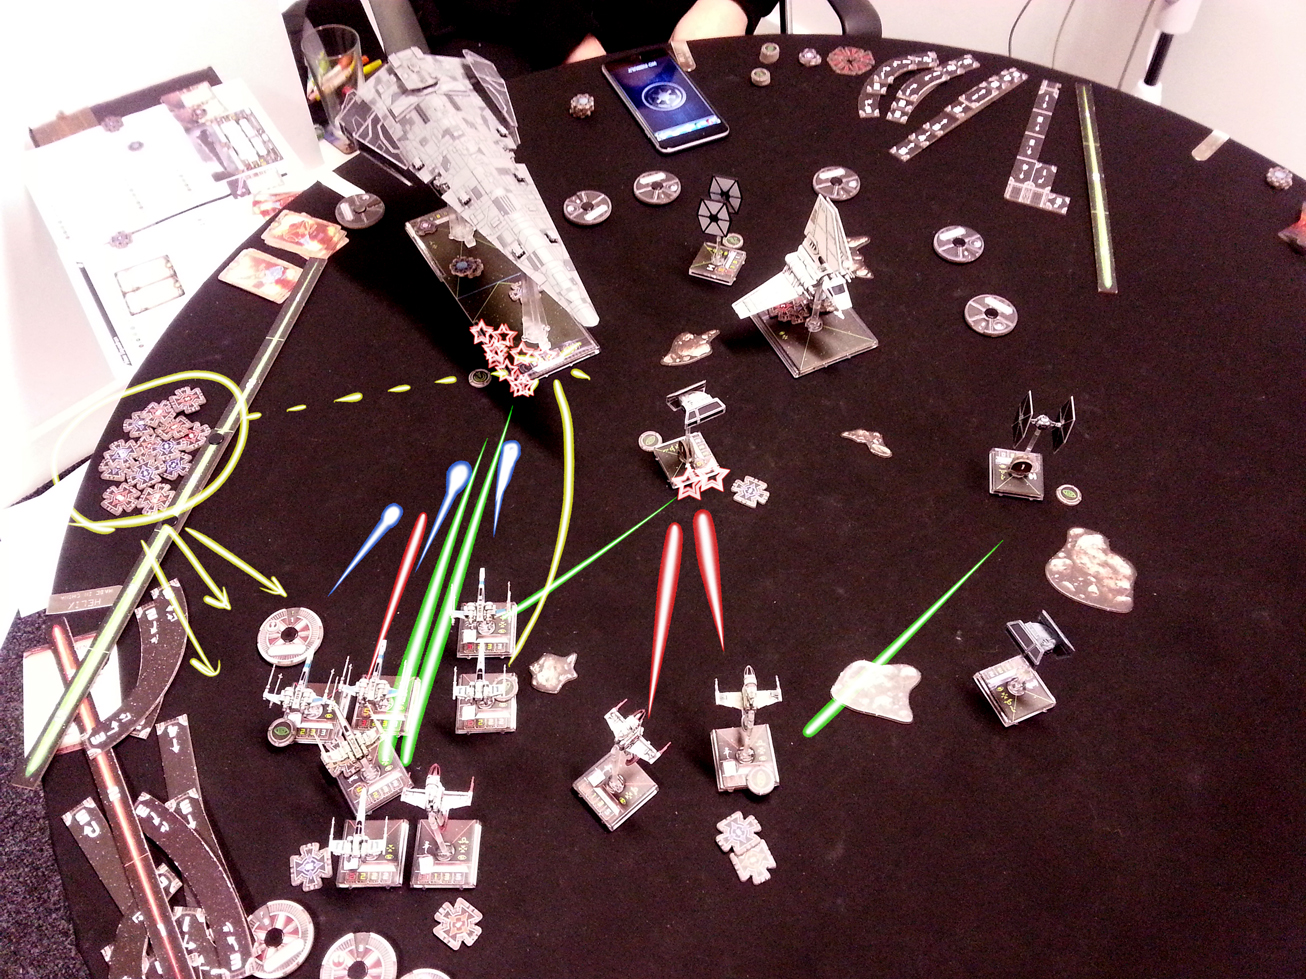
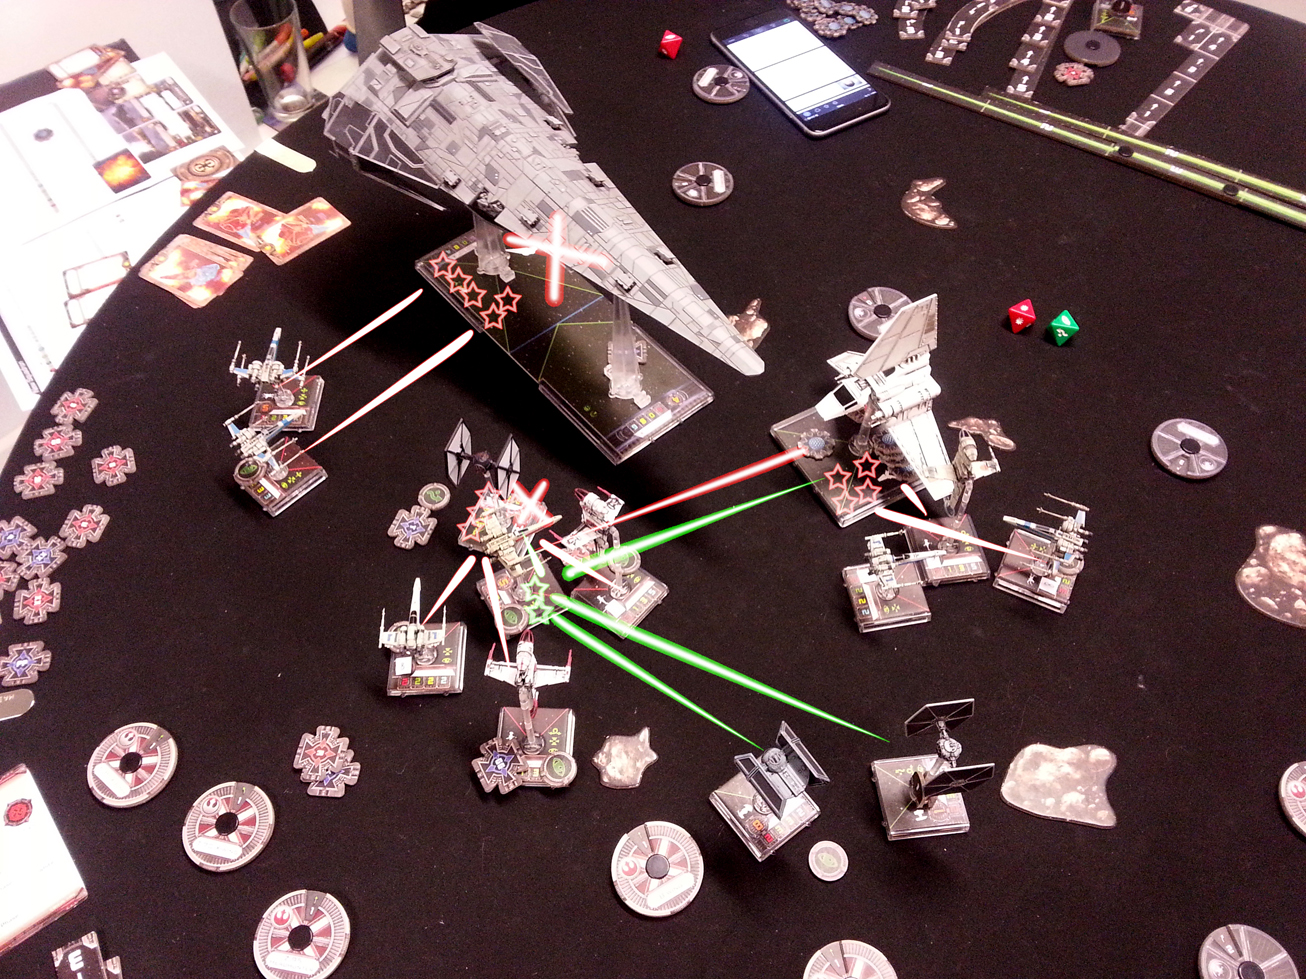
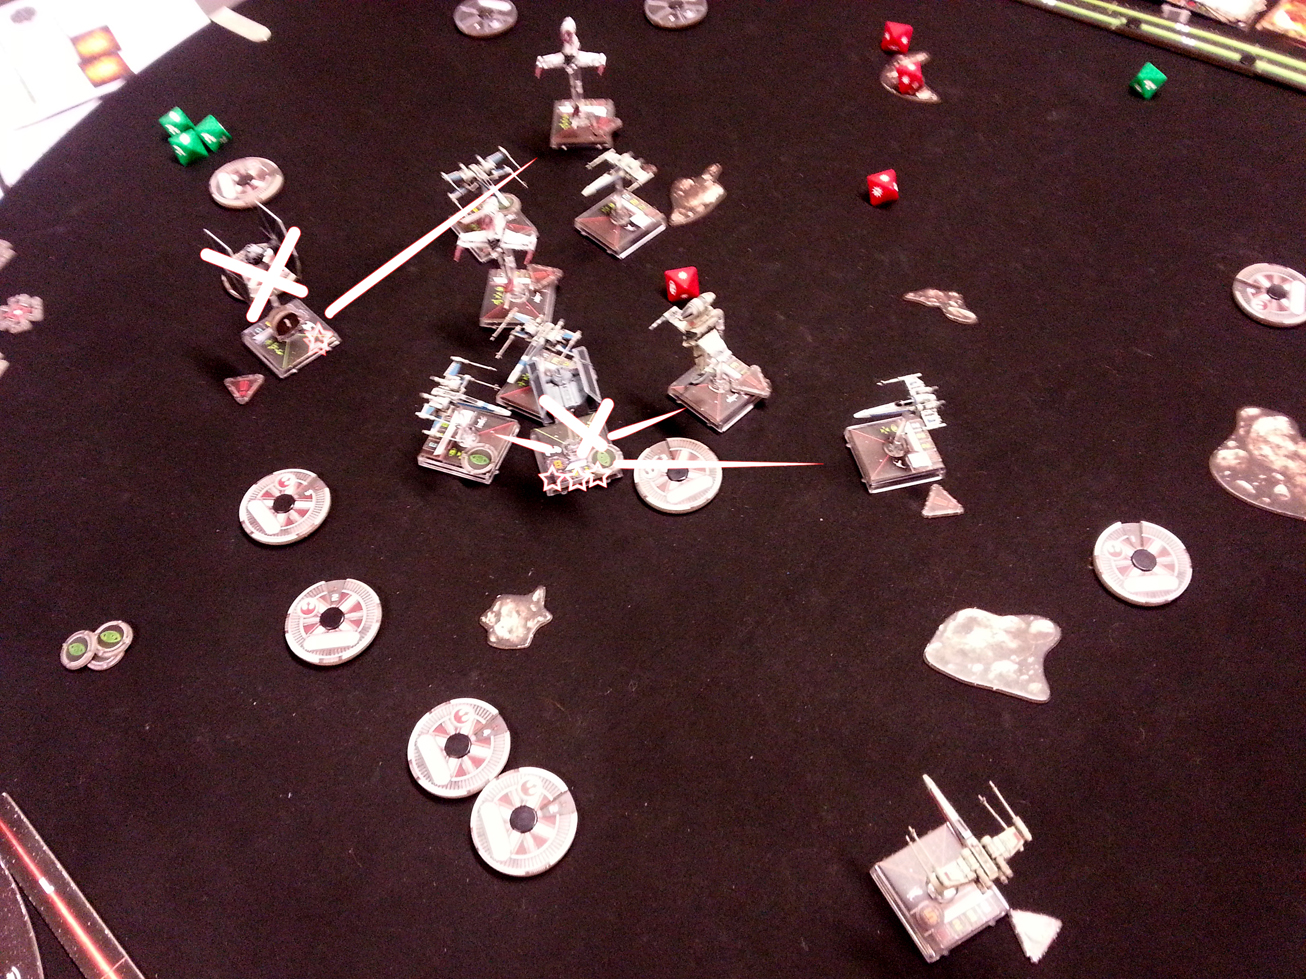
Eclipse chickened out after the hit but Vader is coming in. Unfortunately for him Kayen Farlander broke formation to support the flank and as Vader just in arc. They both do some good damage leaving Vader with a single damage point left. That isn’t the major event of this round. Remember those Z-95s? One of them has a pilot skill of 10 so gets to shoot before everyone else. He was also the only person to take a target lock because he has a tracer missile. It hits the Raider in the nose and Tada! Now the rest of the team has a target lock too, and also a focus. PROTON TORPEDOES AWAY! The raider takes some serious damage to the fore but is still going. It returns fire, (at Biggs of course) but the hated X-wing pilot is lucky enough to only lose a shield this turn. The next turn is going to be an important one. The Raider took a nasty hit and half of the empires force is out of combat.
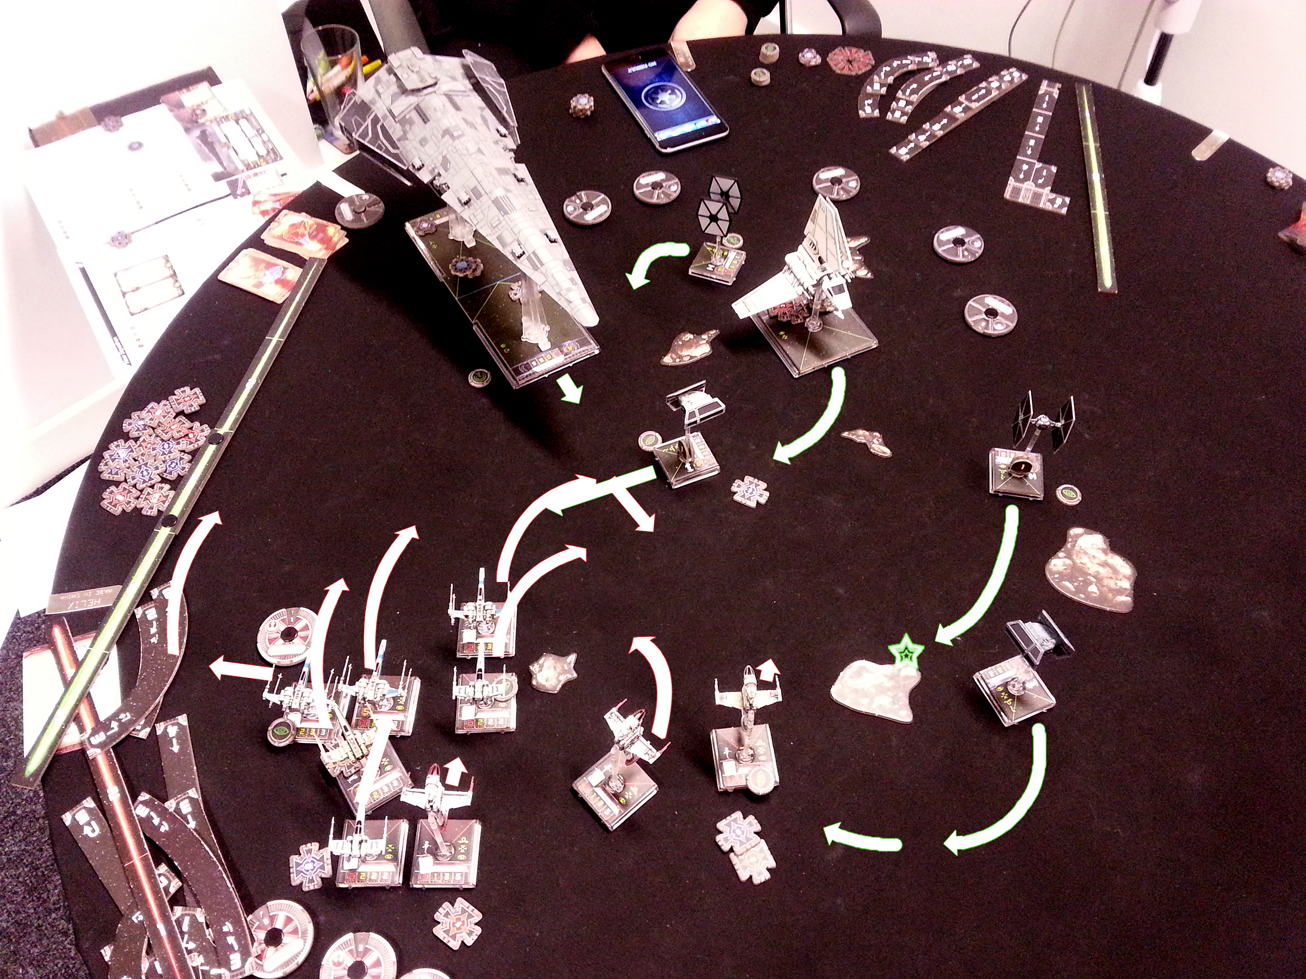
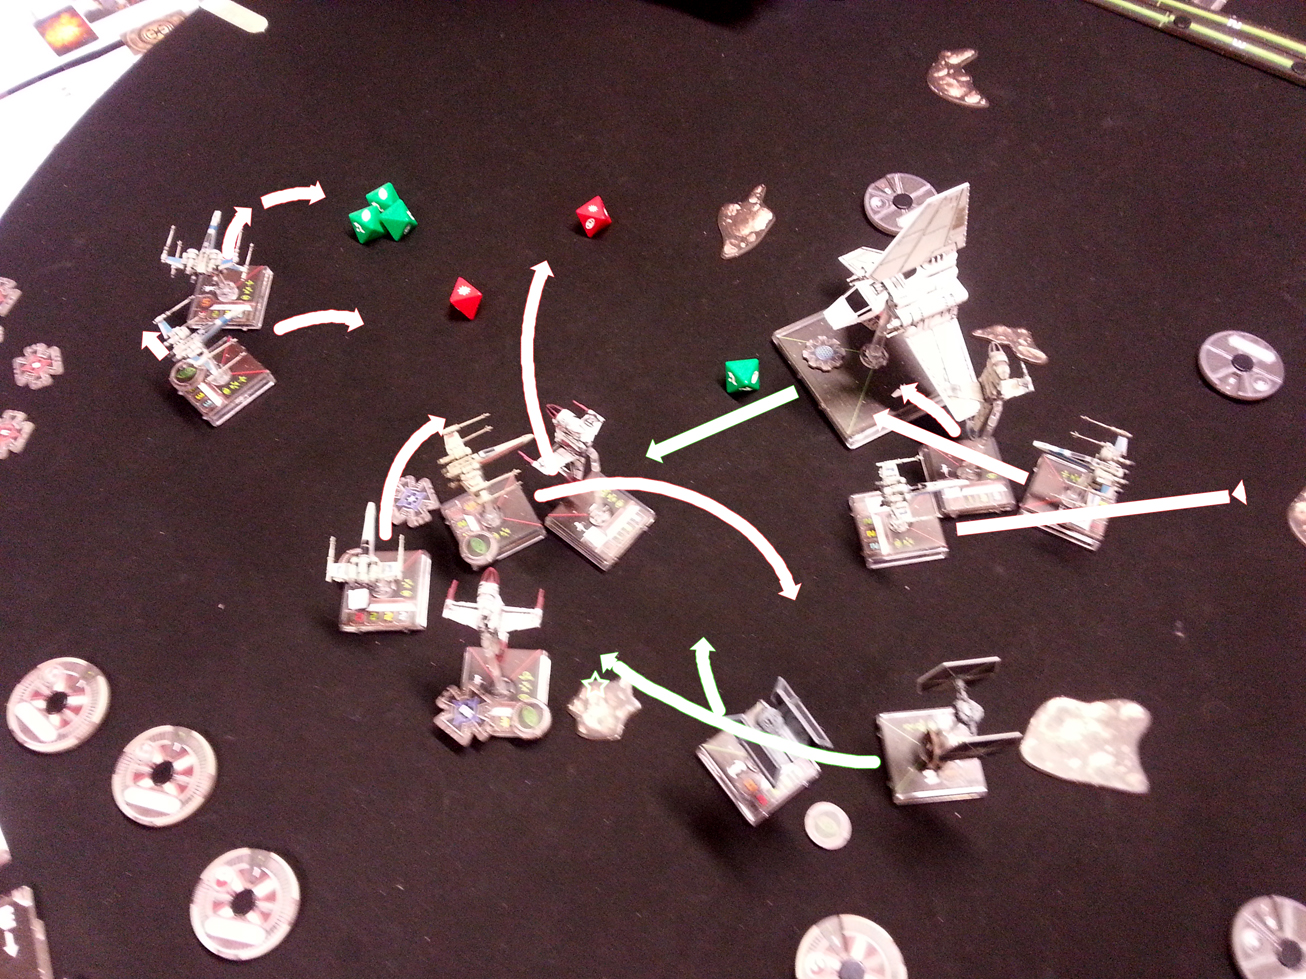
This is the break off point for some of the Rebel attack. If the Imperial Raider charges forward it won’t have a lot of energy to fight or recharge, but being hit by that monstrosity when it moves is instantly fatal. Thankfully for the Rebels, Ello Asty is a god among … slugs I think: he can nip behind Vader doing a fancy sideways 180 turn and still boost afterwards. Ello’s Wing man unfortunately is not quite so talented but sticks with his slug bro to boost him later.The empire has this angle covered however as the shuttle moves around and into position and Ms Eclipse successfully flanks the Rebels completely. On the down side the Omega leader is still on the wrong side of the Raider and out of range, and teh academy pilot is living up to his name by flying into an asteroid. Meanwhile, the rest of the rebel force stays on target. The Raider advances, but decides to play for time by recharging it’s shields rather than doing lot’s of attacks.
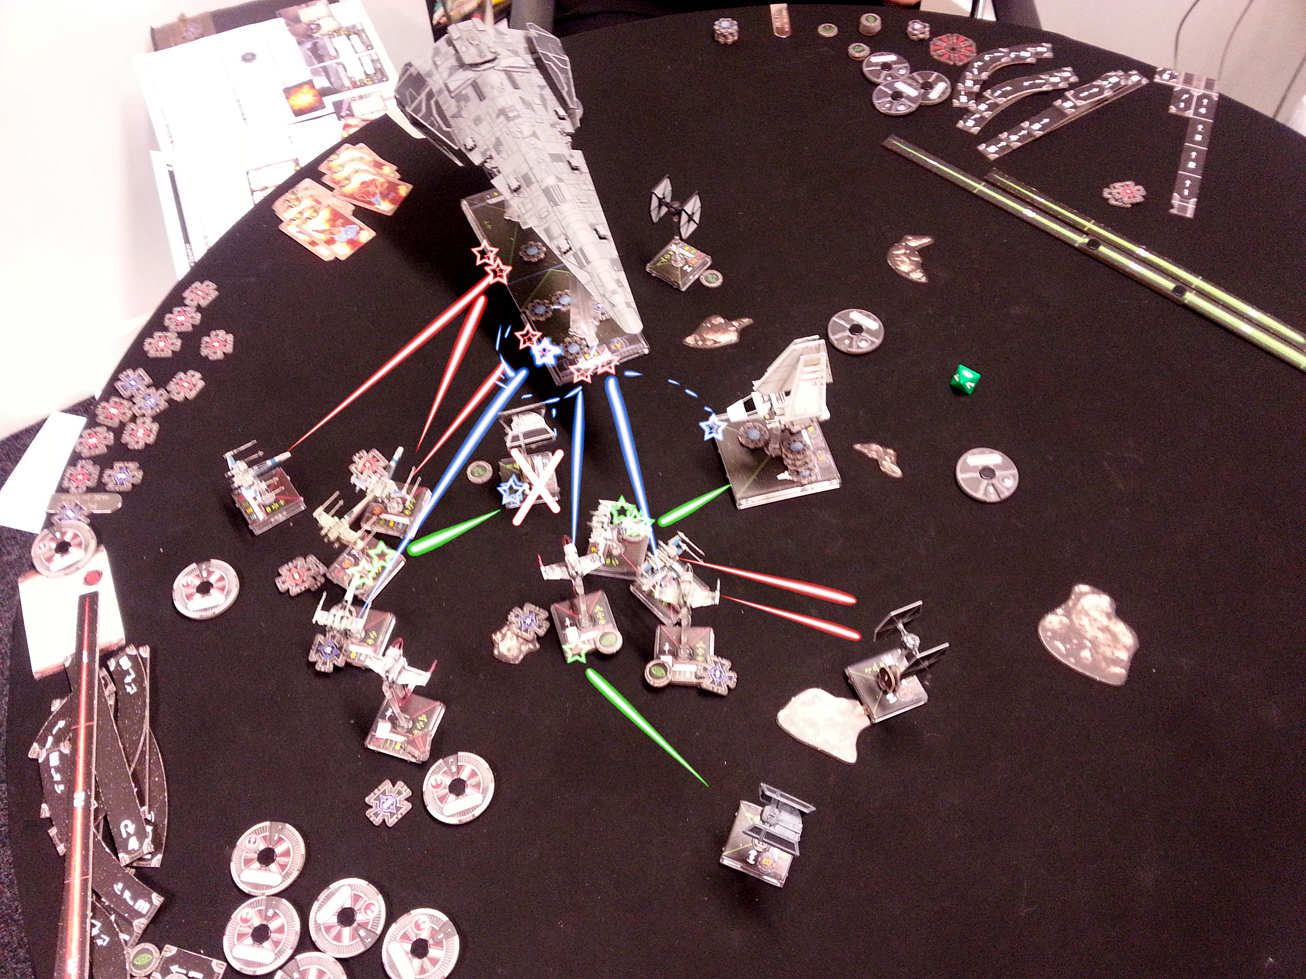
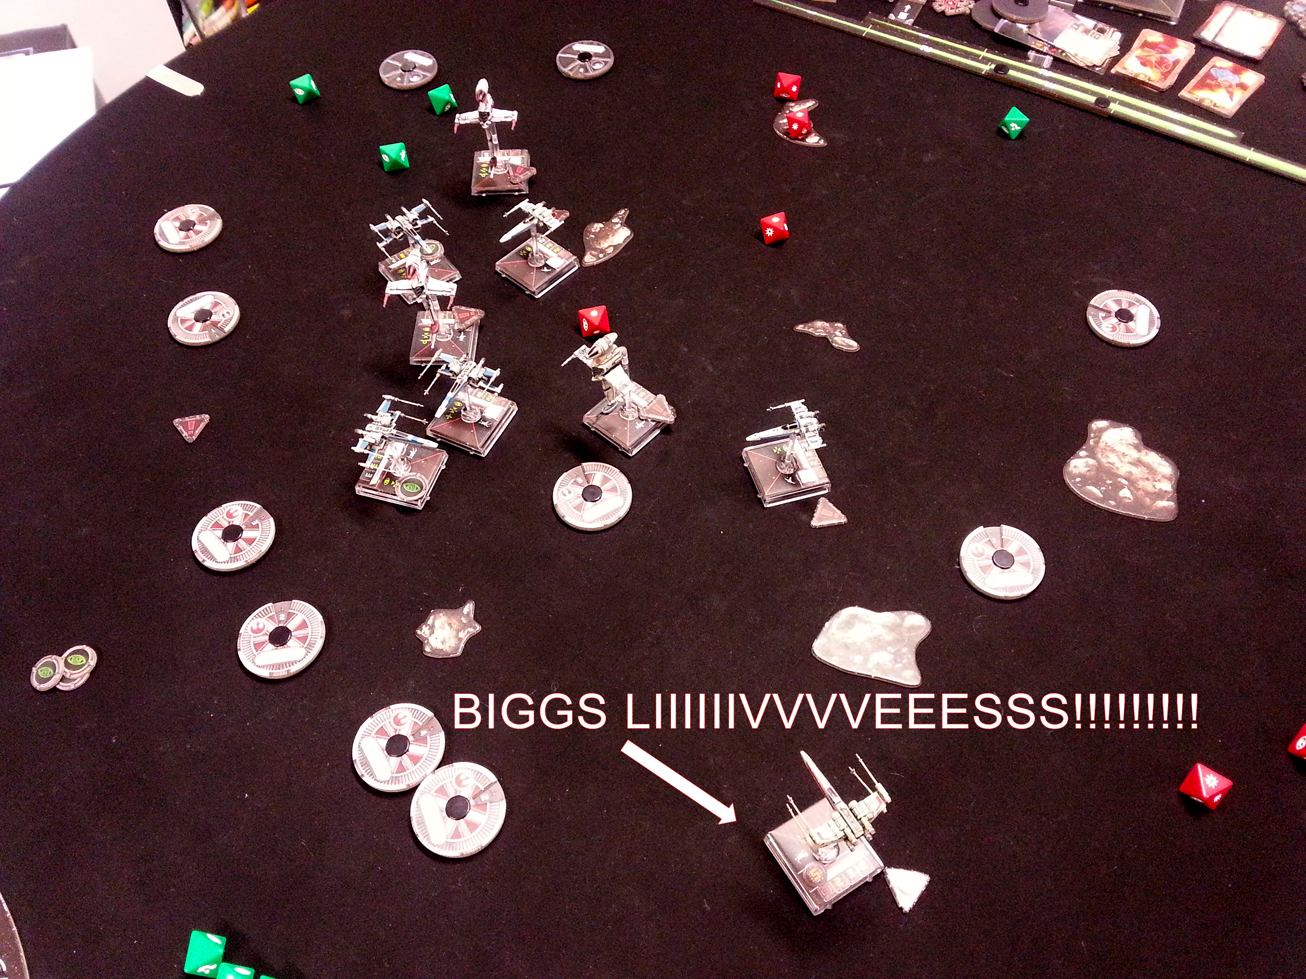
The Raider’s fore is still operational and shielded again, but Poe opens fire on the aft instead. This is because the B-Wings still ahve their target lock on the fore and launch torpedoes. Of course, Vader hates Biggs, so he takes off the rest of Biggs’ shields with a nice shot. Jendon’s Shuttle also slams Cracken in the side with his autoblaster. This is where the otehr little Z-95 comes along with Blount. That guy never misses with a missile, even when he misses. He’s shooting at the Raider though, so he isn’t likely to miss anyway and he hits it with an assault missile which has a nice blast radius effect. The Fore of the Raider is disabled! And Vader only had one hull point left so he goes pop too! It’s a bad round for the Empire overall.
If the Empire is going to turn things around they will need to do some damage, and fast! Jendon holds position to keep everyone in it’s firing ark while the rest of the Imperial fighters charge into attack position hoping to get some good range 1 attacks. The Rebels at this point have made plans in case the raider turns towards them. This kind of manoeuvring is pretty easy for the two T-70s. Poe with BB8 can barrel roll before moving, and Jess can turn on a die with her advanced boost ability. Then there is Ell0 Asty, who’s ludicrous ability lets him 180, after 180 and flip flop his slimy butt right next to Jendon’s shuttle.
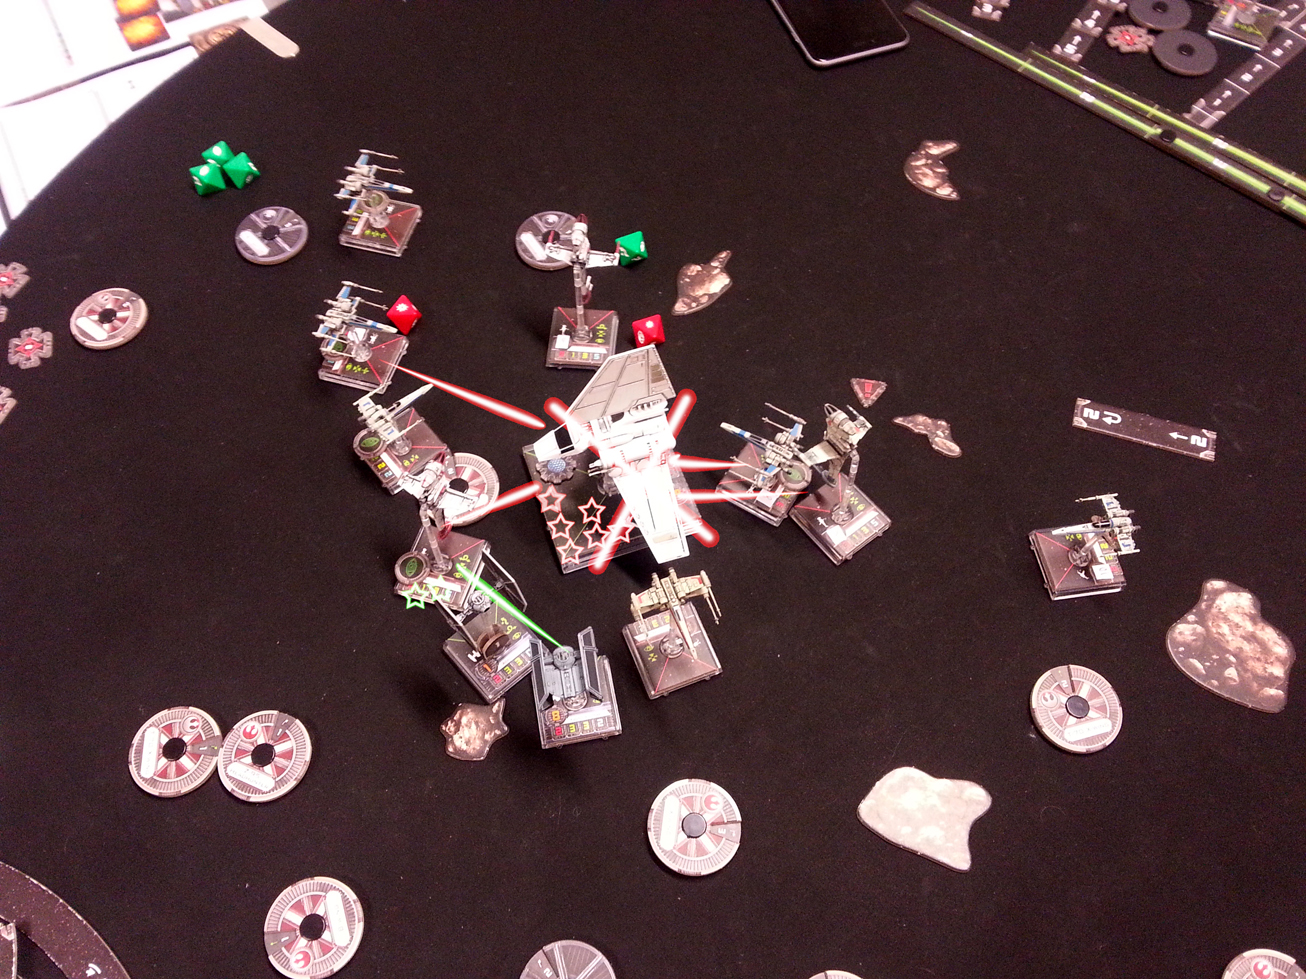
The B-wing’s should be getting a pounding here, but everyone hates Biggs, and he’s STILL not dead! The Imperial ships all shoot at him this turn, but with weaker attacks, range bonuses, and a couple of poor dice rolls, Biggs is still managing to hold his ship together using nothing but force of will, or perhaps will of Force? The Tie FO flown by Omega leader is a very hard ship to kill in one on one fights, but here they have two B wing’s and a Z-95 in close range, so the result (unfortunately for the Empire) is brutal and swift destruction. The rest of the rebels are also well positioned. Poe uses his focus to do some damage, and Jess use Opportunist to give her that extra dice. Having lost the ability to regenerate it’s shields the raider’s defences are hopelessly outmatched. The Empires most expensive craft disappears in a cloud of flame and debris.
Is there any It’s now nine ships against three. Normally at this point the empire would call a tactical retreat and the battle would be done, but since this was the first epic battle we’d ever played we agreed to finish it and see what damage the Empire could inflict. the three ships come together withthe benefit of focusing fire, but unfortunately the academy pilot hits another asteroid. This was the most likely Imperial play and the rebels had predicted it. Biggs at this point is just a flaming pile of scrap with engines, so in a effort to stay alive he breaks off this round in the hope of being behind the two ties. The rest of the rebels however, converge on the central area.
The shuttle is well placed to damage, but with that many guns pointing at it it doesn’t get the chance to shoot. The other Imperial ships do some shield damage to the B-wings but it’s insignificant.
The Empire has one last chance to do some damage and has the academy pilot flip round behind most of the Rebel ships. It’s a mostly successful move given that the rebels are still focused on converging.
The academy pilot’s move has left him out of sight of all but a couple of ships who are also stressed. That’s good because he only has one hull point left. Unfortunately one of those ships is Kayen Farlander, who has a mangler cannon, and can spend his stress token like a focus. The academy pilot goes pop. Juno eclipse on the other hand is quickly finished off by Poe before she can shoot back. It’s finally over.
This was one of the Empires worst defeats in all the matches that have been played. Some poor planning and a bit of bad luck with the attack rolls are to blame, but really the star of the match was the legendary Biggs, who will never get any credit for it because everyone hates him.
I hope some of you found this blow by blow interesting since it was a surprising amount of effort to put together, Next time we record a battle we might try a time lapse video instead. I’ll add the sound effects myself of course PEW PEW.
It’s never a bad idea to follow our random shenanigans on social media so go do that please on twitter, facebook, and instagram.
And even though it’s a bit late to say it now.
May the forth be with you!